Mama Lane Cooks
Food from My Kitchen
Slow Cooked Beef Stroganoff
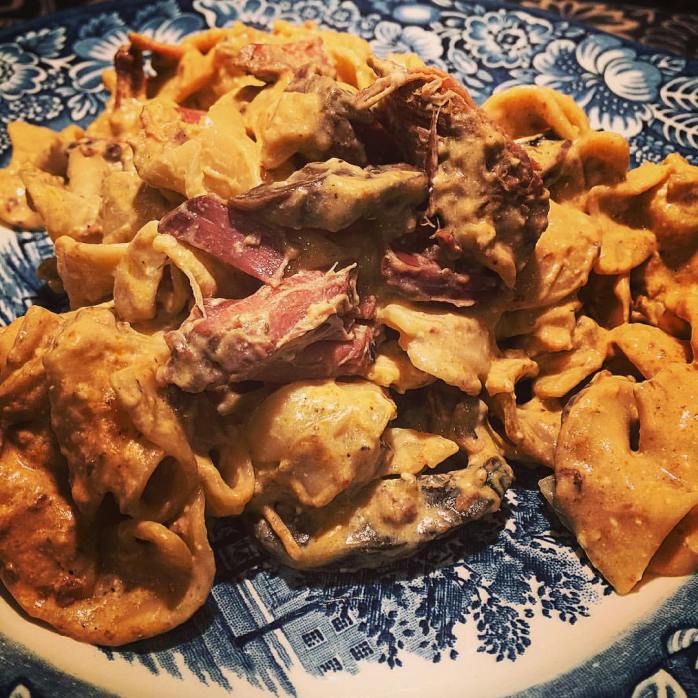 When the weather turns cool, comfort foods like soups and stews, chicken and dumplings, chili, and my family’s favorite beef stroganoff reappear on our menu. Something about settling in for the evening with a warm bowl of home cooked food warms the heart and soul.
This is a great weeknight meal that makes your job easy in the kitchen, so you can spend more time playing with your kiddos this holiday. Enjoy!
Slow Cooked Beef Stroganoff
1.5 lbs beef tips
1 large yellow onion, diced
1 can golden mushroom soup
1 can cream of celery soup
10 oz. fresh mushrooms, sliced
1 tsp. pepper
1 (8oz) cream cheese
1 (8 oz) sour cream
1 (16 oz) bag of egg noodles, cooked
In a crock pot combine the beef, onion, soups, pepper and mushrooms. Cover and cook on high for 6 hours. When the beef is tender, add the cream cheese and sour cream and mix well. Add the noodles and combine.
Cooking Tips Ever Home-cook Should Know
I don’t know how many times I have had to call my mother when I’m in the middle of cooking something to ask, “Mom what is that special thing you do to make (whatever I’m cooking) so perfect.” She usually laughs, then proceeds to explain her ticks of the trade.
I grew-up watching my Grandma Hart and mother in their kitchen and always loved the smells and conversations had over preparing a good meal. I am very thankful to have a mother who has passed on our family’s cooking secrets to me, as now I can cook with my own little family and carry on our family traditions.
I found a special piece of notebook paper the other day among my recipe cards. It was a list of “cooking tips” that I had written down early on in my marriage- things I had heard my mother say or my own tips. Here are cooking tips that have helped me in my own kitchen and I know you will find these tips helpful as well. If you have a special kitchen trick you would like to pass along….please post it here.
Drain Cleaner
To unclog a drain, mix a cup of salt with a cup of baking soda. Pour the dry solution into the drain, and then add a pot of boiling water.
Bread – How to get a light, soft crust
For a light, tender crust, use very hot water and stir only 20 times. Stirring the dough too much will make the crust tough.
Biscuits Tips
Biscuits will be crisp on the outside and flaky in the center if you roll the dough thin and fold it over once before cutting out biscuits. They’ll also split open easily when you’re ready to butter them. To re-freshen and heat biscuits, put them in a well-dampened paper bag, twist it closed and put in a 300 degree oven for several minutes or until warm. If you want soft-sided biscuits, bake them in a pan with sides and put the biscuits close together. If you want crusty biscuits, bake them on a cookie sheet and place them apart from each other.
Dinner Rolls – Freshening When Stale
Seal rolls in a brown paper bag, sprinkle the outside of the bag with water, then heat 10 to 15 minutes in a 350F (175C) oven.
Keeping Rolls Warm
Place aluminum foil under the napkin in your roll basket and the rolls will stay hot longer.
Lowering the Fat, Oil in Baking
When baking, use fruit purees, applesauce, or plain non-fat yogurt instead of oil.
Apples – For Pies
Which apples are good for pies? Excellent for pies: Cameo, Cortland, Golden Delicious, Granny Smith, Jonathan, Newton Pippin, Pink Lady, Rome Good for pies: Braeburn, Empire, Fuji, Gala, Ginger Gold, Jonagold
Freezing Pies
Custard and cream pies do not freeze well, which unfortunately means that the requisite Thanksgiving pumpkin pie cannot be made ahead of time. However, fruit pies, especially unbaked ones, freeze beautifully, as do baked pecan pies and cheesecakes. To prevent sogginess, brush the bottom crust of fruit pies with egg white before adding the filling. Before freezing, wrap pies and cheesecakes securely in several layers of plastic wrap, followed by a layer of aluminum foil. Allow already-baked items to thaw overnight in the refrigerator before serving. To bake a frozen fruit pie, leave it at room temperature for 20 minutes to allow the glass plate to warm up, brush with beaten egg and sprinkle with sugar if desired, then bake as usual, adding about 20 minutes to the baking time.
Green Peppers, Freezing
Green peppers may be frozen without blanching in an airtight container for later use in hot dishes or casseroles.
Cooking with Wine
When cooking with wine, leave the pan uncovered so the alcohol will burn off. The resulting liquid will have a rounder, firmer, fruiter flavor.
Grilling – Preventing Overcooking
To avoid burning vegetables before they’re done, push them to the side of grill where heat is moderate. Wrap the ends of bone in ribs with aluminum foil to prevent drying and burning.
Grilling Vegetables
For the best results, rub the vegetables with vegetable oil or toss them with a clear or light marinade prior to grilling. Although some cooks prepare corn for the grill by soaking it in its husk and grilling it cloaked, this method steams the vegetable rather than grilling it. For the smoky flavor typical of grilled foods, husk the ears and cook them directly on the grill rack.
Eggplant can be cut lengthwise or crosswise into 1/2-inch-thick slices.
Red, purple, orange, white, yellow, and green peppers are tasty when grilled. Add them to appetizers, sandwiches, and home-baked breads and pizzas as well as salads. Potatoes can be cooked whole or cut into halves, thick slices, or wedges.
To reduce grilling time, blanch cut potatoes for 10 to 15 minutes before grilling.
Summer squash, including zucchini, yellow squash, and pattypan, can be cut into chunks and used for kabobs. You can also slice them lengthwise.
Select firm ripe tomatoes or plum tomatoes for grilling. Cherry tomatoes are easily cooked on skewers.
To prevent onion slices or wedges from falling through the grill rack, cut a large onion into 1/2-inch-thick slices or inch-wide wedges, then push a small metal or water-soaked bamboo skewer through the onion sections to secure them.
To roast peppers, put whole peppers on the grill over medium heat for 15 to 20 minutes, turning occasionally until skin is charred on all sides. Put the peppers in a brown bag, fold over the top to seal, and cool for about 15 minutes. Then cut peppers lengthwise in half and discard stems and seeds; place cut-side down on work surface and scrape off skin with a small knife.
To roast portabello mushrooms, brush with olive oil and grill 4 to 5 minutes each side. Asparagus: Break off and discard tough asparagus ends. Blanch tips in a large pot of boiling salted water for a minute or two (depending on size), just to remove the raw taste. Drain and transfer to ice water to stop the cooking. Drain again and pat dry. Roll in olive oil. Sprinkle with kosher salt. Cook directly over hot coals, turning the asparagus with tongs as they color, until they are lightly blistered by the grill and hot throughout, about 2 minutes.
Carrots: Leave skinny carrots whole. If carrots are thick at the top and thin on the bottom, cut them in sections and halve the thick ends. Roll carrots in olive oil and season with salt and pepper. Grill over indirect heat until softened, about 20 minutes, moving them progressively closer to the coals.
Potatoes: Roll whole red potatoes, about 1 1/2 inches in diameter, in olive oil. Season with salt and pepper. Grill over indirect heat until the potatoes can be pierced easily, 30 to 40 minutes, moving them progressively closer to the coals.
Sweet potatoes: Grill large, whole sweet potatoes directly on ash-covered coals (not on the grate). Mound some of the coals around the sweet potatoes. Give them a quarter-turn about every 15 minutes so the skin chars evenly. Keep vents partially closed and grill covered so fire does not get too hot. Sweet potatoes weighing about a pound will take 45 to 50 minutes. Split in half and serve with butter.
Grilling Fruits
Apples: Cut 2 large apples into quarters, then core and peel. Brush with melted butter. Grill over indirect heat (not directly over the coals) until softened, about 45 to 55 minutes, moving them progressively closer to the coals. Remove from grill, sprinkle with brandy or rum and top with vanilla ice cream.
Bananas: Put whole ripe bananas, unpeeled, directly over ash-covered coals and cook, turning occasionally, until they are soft, about 15 minutes. Peel carefully, slice and serve over vanilla ice cream or frozen yogurt.
Melon: Halve a medium cantaloupe lengthwise and remove the seeds. Cut each half into six wedges. Peel the wedges. Brush the melon with melted butter. Grill directly over coals until hot throughout and lightly marked, 3 to 5 minutes. Serve with grilled pork or ham steaks.
To Brine or Not to Brine…That is the Question
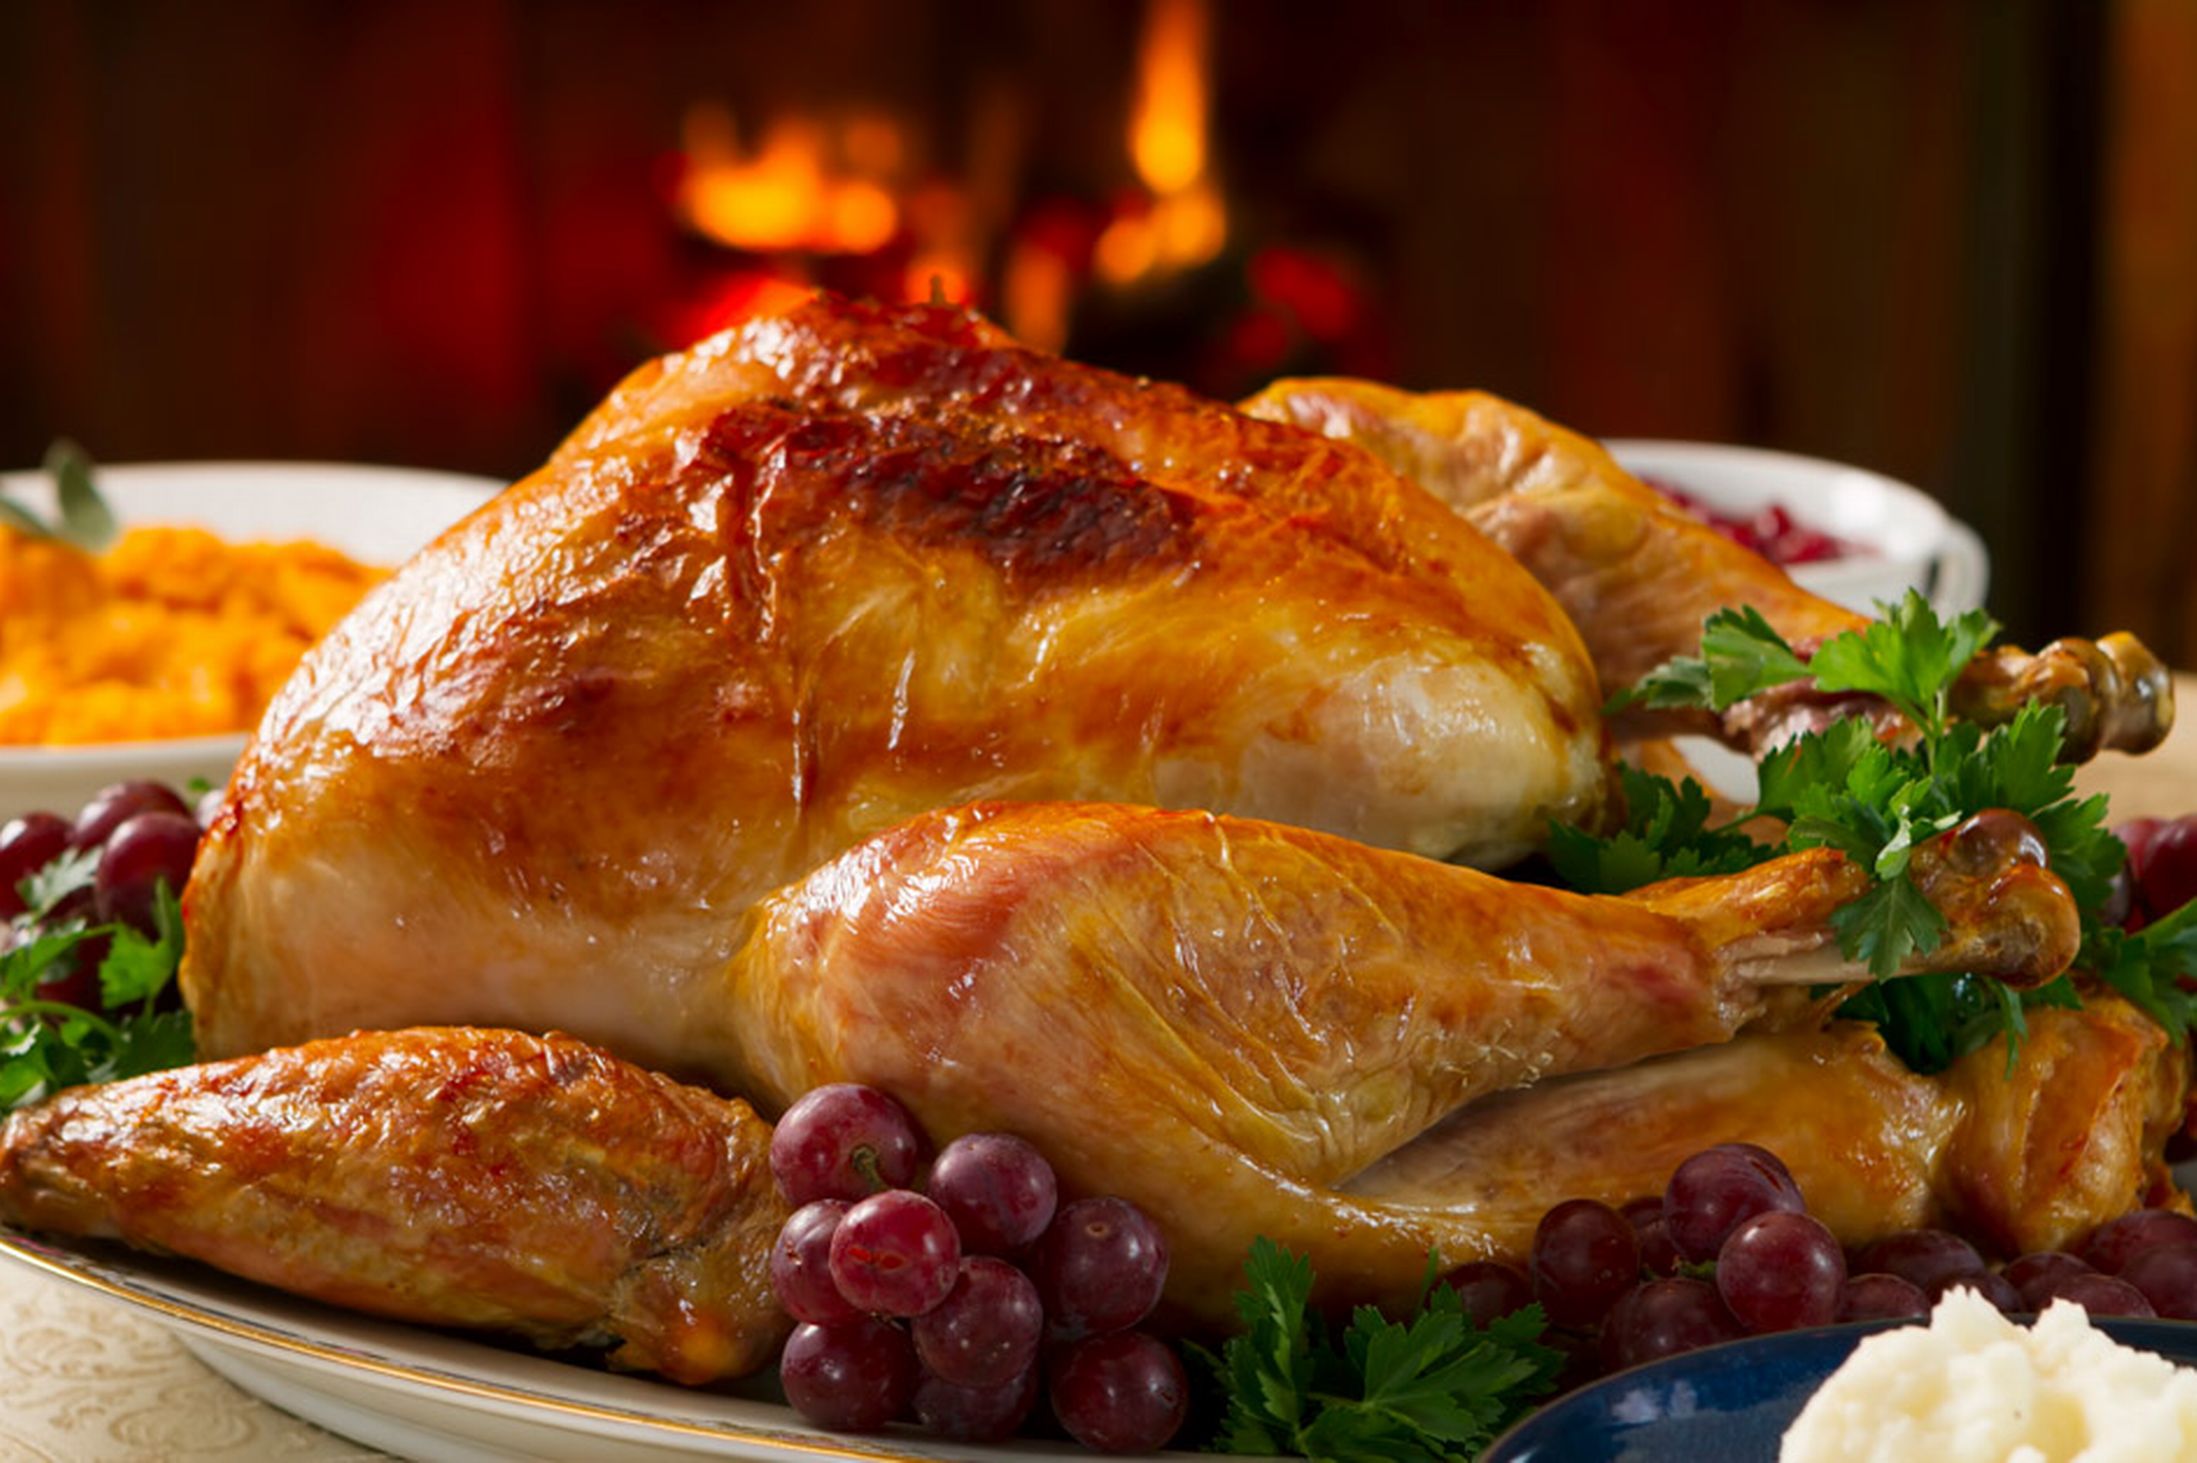 Some say that turkeys don’t need to be brined, but in my opinion a brine can really add a little tasty punch to your holiday turkey.
Brine you may ask? Brining adds moisture and flavor to poultry and helps to keep it from drying out. A turkey can be a serious investment in time so you want to make sure it is perfect, especially if you’re entertaining. Whether you grill, smoke, fry, or roast your turkey, you should use a brined bird.
A brine is simply a salt and liquid mixture that adds lots of great flavor and moisture to your bird. There are many recipes out there for the perfect brine, but all do about the same thing. However, there is one step that is a must when brining a bird- you must brine the bird for at least 24 hours, otherwise the entire brining process just isn’t worth it.
To properly brine a turkey you need to start the night before you plan to cook. You will need at least 10 to 12 hours (plan on 1 hour per pound of turkey), a container large enough to hold your turkey and enough brine to cover it. You’ll also need salt, water, sugar, seasonings, and enough room to refrigerate it. A large stainless steel stock pot or even a 5 gallon clean plastic bucket (or my family has used a clean cooler before) would make excellent containers. Whatever container you choose, the turkey needs to have enough room to be turned so it should be big.
Now let’s get to the turkey. The turkey should be cleaned out, completely thawed, and should not be a self-basting or Kosher turkey. Self-basting and Kosher turkeys have a salty stock added that will make your brined turkey too salty. A fresh turkey works best, but a completely thawed, previously frozen turkey will work just as well. Look for local turkey from area growers at your local farmers market.
Make the Brine
Mix 1 cup of table salt in 1 gallon of water. You will need more than 1 gallon of water, but that’s the ratio to aim for. Make sure that the salt is completely dissolved before adding the seasonings you like, making sure not to add anything that contains salt. Brines can be spicy hot with peppers and cayenne, savory with herbs and garlic, or sweet with molasses, honey and brown sugar. My favorite seasonings to add are fresh herbs like thyme and parsley and onions and garlic.
Sugar is optional to any brine, but works to counteract the flavor of the salt. While you may choose a brine without sugar, I do recommend that you add sugar (any kind of “sweet” will do) to maintain the flavor of the turkey. Add up to 1 cup of sugar per gallon of brine. Like the salt you need to make sure that the sugar is completely dissolved.
Place the turkey in a container and pour in enough brine to completely cover the turkey with an inch or two to spare. You do not want any part of the turkey above the surface of the brine. Now you put the whole thing in the refrigerator. If you are like me, making enough room in the fridge is the hardest part of this project. The turkey should sit in the brine for about 1 hour per pound of turkey. Brining too long is much worse than not brining enough so watch the time.
Don’t have room in the refrigerator? Try a cooler. A cooler big enough to hold your turkey makes a good container for your turkey and brine. The cooler will help keep it cool and allow you to brine your turkey without taking up precious refrigerator space. If the weather is cool, but not freezing you can put the whole thing outside until you need the turkey (just add ice to the cooler).
When you are ready to start cooking your turkey, remove it from the brine and rinse it off thoroughly in the sink with cold water until all traces of salt are off the surface, inside and out. Safely discard the brine and cook your turkey as normal. You will notice the second you start to carve your turkey that the brining has helped it retain moisture. The first bite will sell you on brining turkeys forever, and after you’ve tried this you will want to brine all your poultry- I promise!
Check out these great turkey brine tips before the BIG Turkey Day to help you out as well.
Whether you decide to brine this Thanksgiving or Christmas or not- I wish your family happy holidays and the best to the new year!
Ultimate Chocolate Chip Cookies
 Who doesn’t want to take a bite out of the perfect chocolate chip cookie? Every good baker must have the ultimate chocolate chip cookie recipe in their baking arsenal. I’ve gone through hundreds of batches of cookies and there is one recipe that is the stand alone winner for the best chocolate chip cookie.
This is a Martha Stewart recipe that I’ve only slightly changed the baking directions from the original. I strongly recommend using high quality chocolate when baking cookies, it’s the small things that make an average cookie or the ULTIMATE Chocolate Chip Cookie.
Ultimate Chocolate Chip Cookies
Adapted from Martha Stewart’s EVERYDAY FOOD, OCTOBER 2009
3 1/2 cups all-purpose flour (spooned and leveled
1 1/4 teaspoons baking soda
1 1/4 teaspoons baking powder
2 teaspoons coarse salt
1 1/4 cups (2 1/2 sticks) unsalted butter, room temperature
1 1/2 cups packed light-brown sugar
1 cup granulated sugar
2 large eggs
1 1/2 teaspoons pure vanilla extract
1 1/4 cups milk chocolate chips
8 ounces semisweet chocolate, chopped
In a bowl, whisk together flour, baking soda, baking powder, and salt. In a large bowl, using an electric mixer, beat butter and sugars on medium-high until light and fluffy, 6 minutes. Reduce speed to medium-low and beat in eggs, one at a time. Beat in vanilla. Mix in flour mixture just until incorporated; fold in chocolate chips and chunks.
Refrigerate the dough for at least 1 hour. Preheat the oven to 350 degrees, with racks in upper and lower thirds. Using an ice cream scoop, roll dough into 1-inch balls. Arrange 6 unbaked cookies, 3 inches apart, on each of two parchment-lined baking sheets. Bake until edges are light golden brown, 16 to 17 minutes, rotating sheets halfway through. Transfer cookies to a wire rack and let cool.
Skip the Can, Make Your Own Pumpkin Puree
 I grew-up in a home with everything was homemade- including the pumpkin puree used to make Thanksgiving pumpkin pie. We grew our own pumpkins in the garden. My dad always planted heirloom seed and planted a French variety pumpkin that made the BEST pumpkin pie.
We would grow our pumpkins, puree them and measure out a specific measurement of puree then place in freezer bags and freeze the puree until we were ready to use it. That way all we would have to do is go the freezer, thaw the pre-measured pumpkin and add it to our recipe…and let the magic begin.
Personally, I do not like ANY canned pumpkin. Maybe it’s the feeling of accomplishment eating my own processed pumpkin, I don’t’ know. But, I do know there is a major taste difference in canned vs. processed pumpkin.
If you are worried about a long process to make your own pumpkin puree, don’t fret. It’s a fairly simple process to actually process your own pumpkin puree.
First, pick out a small sugar pumpkin or French variety. Not the large Jack –o’-lanterns you see in many farmer’s fields. Those types of pumpkins have a very fibrous flesh and are not as sweet tasting as the smaller varieties. The smaller variety only weighs about 4-8 lbs, has a good stem intact and needs to have no soft spots of blemishes. Here’s a list of good varieties for making your own pumpkin puree.
You can find these smaller cooking pumpkins at farmers markets, specialty stores and sometimes even grocery stores.
To make your puree:
Cut the pumpkin in half lengthwise, remove seeds (but save them, they make excellent garnishes for dishes and are great toasted) and stringy fibers, and place cut-side down in a greased baking pan. Add about 2 cups of water. Bake at 350 degrees F until the pumpkin is soft to the touch. Scoop out the pulp and puree in a food processor until smooth. You may have to add a little bit of water in the food processor or blender to get the mixture to puree smoothly. Cool before using or store in freezer bags.
*I like to pre-measure all my puree in freezer bags. This way it’s very easy to go to the deep freeze and grab a pre-measured bag. I also like to add some spices like cinnamon, nutmeg, and ginger to some of my puree and freeze in ice cube trays to use for smoothies.
*We make pumpkin soup, muffins, bread, pie, smoothies and more with our puree all-year.
Your are guaranteed to impress family and friends with your next pumpkin creation using homemade pumpkin puree!
She Crab Soup Winning Recipe
 I love a good food competition, especially when I can use high-quality products from my local farmers market. The Farmers Market of the Ozarks recently held it’s 4th Annual Soup-Off Competition to help raise funds for non-profit organization, Harvest on Wheels, and I decided that a seafood soup would be the perfect entry.
I’m fortunate enough to have the best hook-ups in 417 Land for foodie finds, so I called on Chris Perkins of Express Food and FMO vendor (and who I like to call MY Seafood Guy) for some stellar lump crab meat to bring this recipe to the top- and he delivered! I learned that Chris orders in lump crab for many of his restaurants deliveries each week (I think I will now be one of those weekly buyers, bc this crab was out of this world.)
 I took out a couple of bags of frozen broccoli that I put up this year, purchased from Teng Yang of Nature Valley Farm at FMO. (I always buy in bulk when products are in season, that way I can always enjoy fresh, local foods all year.)
Also for this recipe I used Ozark Mountain Creamery milk, which is produced by the Fry family in my hometown of Mtn. Grove. You can find their glass-bottled milk in many grocery store chains in the Ozarks. It. Is. SO. Good.
My family loves this soup and guess what…so did all the customers at FMO last weekend, as I took home the Soup-Off Winning Title. The competition also helped raise Harvest on Wheels over $350- so I’d call this a win-win for everyone!
 She Crab Soup
Make your soup base:
5 celery stalks, washed and roughly chopped
5 gloves garlic, whole
1 cup white onion, roughly chopped
1 tsp. salt
½ tsp. pepper
1.4 tsp. sugar
6 T. butter
1.5 cups of vegetable stock
2 cups milk
Add to the soup base:
2 quarts half and half
1 stick of butter
1 lb. of lump crabmeat (if using canned crab meat 4-5 (6 oz) cans)
1 lb. of steamed broccoli florets
1 ½ tsps. Of Old Bay seasoning
3T. dry mustard powder
In a Dutch oven or large stock pot, add the 3 T. butter, onion, celery and garlic and sauté on medium heat for 5 minutes. Add the salt, pepper and sugar. Add 1.5 cups of stock and simmer until vegetables are soft- about 15 minutes.
Puree your vegetables with the stock. This is easiest if you have an immersion blender, but you can also use your blender. I like to leave the puree with a little chunks of vegetables, but the majority of the base should be a smooth texture.
In the same pot you cooked the vegetables in, on medium heat, add three tablespoons of butter and add an equal amount of flour and cook over medium low heat until the mixture is blended, about 1 minute- this is a roux.
Add 2 cups of milk to the roux, whisking constantly. Bring the mixture back to a oil and heat until the sauce is smooth and thick.
Add to the roux mixture the half and half, butter, and seasonings. Bring the ingredients to a slow simmer for 20 minutes. Be sure and stir the mixture often. Meanwhile, steam the broccoli florets. Chop the steamed florets, coarsely.
After the soup mixture has simmered for 20 minutes, place crabmeat and broccoli in pot and simmer until the mixture is thick enough for your own taste, typically 10 minutes and remove from heat. Check the taste and add salt as needed.
Garnish with white cheese and oyster crackers.
Chicken Corn Chowder
 A new soup I’ve been working on is my Chicken Corn Chowder. This soup really does the trick on a cold day paired with toasty french bread and butter. From what everyone’s saying, this winter is going to be a cold, long one so you better stock-up on soups.
I start making soups and chili to freeze in October, so our family always has something nutritious and homemade to eat around the house. This comes in handy with a young family on the go, like ours.
Cook your soups and chili, cool, and then simply place in freezer bags. Freeze flat for easy stacking in your deep freezer and be sure to label your bags with the type of food and when you made it.
Happy Soup Making!
Chicken Corn Chowder
2 large chicken breasts, cooked and chopped (season the chicken before cooking)
1 cup of red onion, chopped
1/4 tsp jalapeno, mined
6 cups of new potatoes, diced
5 cups water
1/2 stick butter
1 tsp thyme
6 slices of cooked bacon, crumbled
2 cloves garlic
Sprinkle of crushed red pepper
2 bay leaves
2 cans evaporated milk
2 cans of creamed corn
Salt and pepper to taste
Chopped green onions to garnish
1 cup shredded white cheddar cheese
Raspberry Jalapeno Freezer Jelly


Has your garden ever produced so many jalapenos you wondered why you planted four plants for a family of four? When I garden, I go all-out! And plants are like really good potato chips, you can’t just have one. I can’t just plant one variety of a plant…I want another and another and another.
This season we installed raised beds at our house, as we started a three-year backyard project that consists of raised beds, a micro orchard and a small greenhouse. I might even throw in a moveable chicken coop if the hubby agrees to build one.
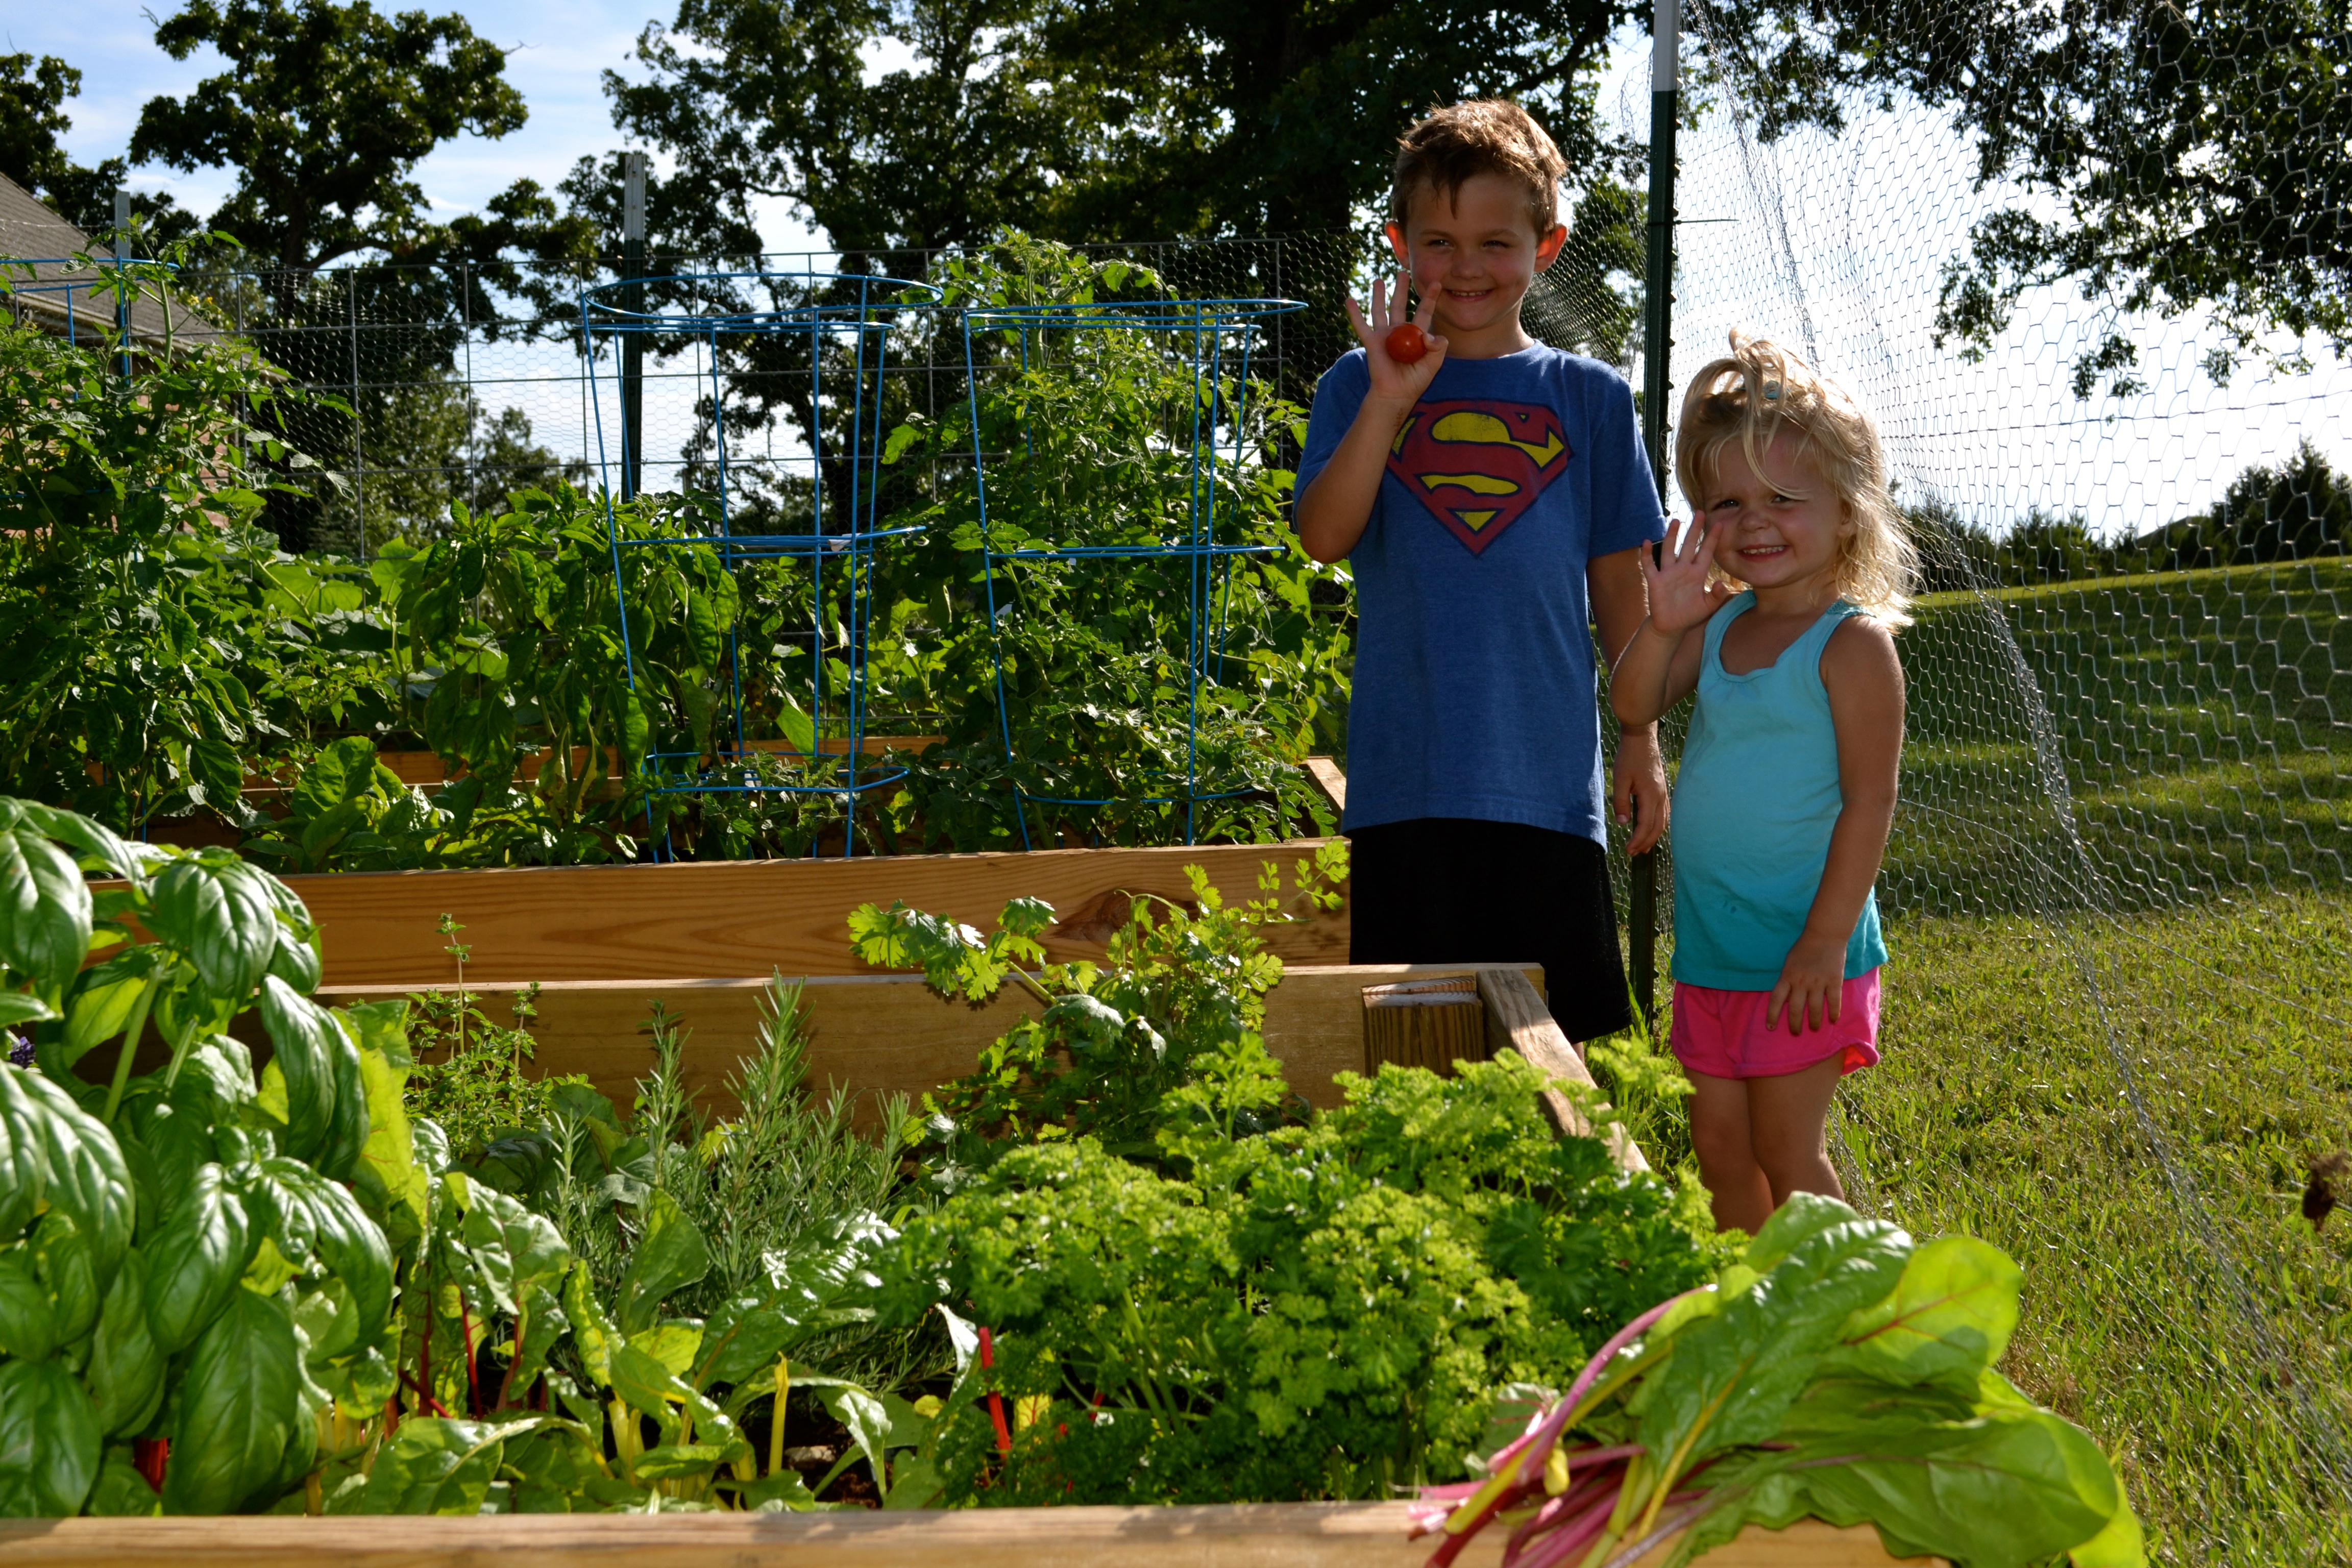
We installed only three raised beds early this spring and I have to say that my garden really impressed me with the amount of produce harvested for my family of four. Swiss chard, kale, carrots, beets and spinach were our spring crops, huge variety of herbs, seven tomato plants, lots of pepper plants, more carrots, Swiss chard and beets, cucumbers, and we even harvested a couple pie pumpkins and six delicious cantaloupe and banana melons. Now, our garden has turned to fall with our pepper plants and herbs still producing, lots of spinach and bibb lettuce, carrots, beets and tons of winter squash (spaghetti, acorn and butternut).
Ok, enough rambling on about my three little raised beds (I work around real produce farmers that produce FIELDS of produce) and here I am rambling….Back to the massive amounts of Jalapeno peppers that I was left with this season (and still harvesting from my garden). I decided to try my hand at making jalapeno jelly to not waste any produce from our garden. (I shared with all our neighborhood and there are only so many jalapeno peppers one family can actually consume.)
I did some research on the web and talked to my own farmers about any good recipes for pepper jelly and finally decided to take a base pepper jelly recipe and add my favorite fruit- raspberries- to it. The result- HEAVEN! I think raspberries are the perfect compliment to the hotness of the jalapeno and this recipe is super easy- no canning needed, just lots of freezer space.
This is a freezer jam that is easy and tasty- guaranteed. I’ve put up 30 half pint jars thus far and will be making more this weekend. I plan to use these as Christmas gifts for family and friends. Plus, I just love to share good, wholesome food with friends!
NOTE: Two key things I learned about messing with jalapenos- wear gloves and whatever you do- DON’T TOUCH YOUR EYES! I made this mistake in the middle of my third batch and found myself crying the entire day, not to mention my burning hands that continued to last for THREE SOLID DAYS. (I’ve sliced a jalapeno before, but never so many at once- wear gloves- you will thank me!)

Raspberry Jalapeno Jelly
6 cups whole berries
1/2 c. minced fresh jalapeno pepper, add more for a stronger heat
1 c. water
1 box SURE-JELL fruit pectin
5-1/4 c. sugar
Have 8, half pint jars washed, rinsed and dried. In a food processor add the berries and plus the processor a few times to crush the berries. Next add the jalapeños and sugar and plus about 10 times. Pour this mixture into a large bowl and let stand 10 minutes, stirring every so often.
While the berry mixture is hanging out, doing it’s thing, bring the water and pectin to a boil over high heat in a small saucepan. Boil this mixture for about 1 minute.
Pour the pectin mix over the berry mixture and stir for 3 minutes, constantly. Fill the jars with the mixture, leaving about ½” of container top. Clean off the edges of the jars to remove any spilled mixture. Cover with lids and let stand at room temperature for 24 hours.
You can use the jam after 24 hours, store it in the fridge for a month or freeze for up to a year. To use after being froze, thaw in the refrigerator.
Uses for Raspberry Jalapeño Jelly
- Top crackers with cream cheese and jelly
- Use as a baste for pork chops and chicken
- Make spicy peanut butter and jelly sandwiches
- Use a couple tablespoons with a spicy stir-fy
- Use for a terrific baste for salmon: Mix together bourbon liquor, honey, melted butter and pepper jelly and spread over salmon and cook
What’s your favorite way to use pepper jelly?
Fresh Cherry Pie Filling
 What’s your favorite dessert? I would have to answer- PIE. Some folks are cake people, some are cookie people, and I am for certain a pie person.
I’m a southern gal, so maybe that is where the love of pie comes from…or maybe it’s because nothing is better than a sweet pie filling and a flakey crust.
It only took me 7 years to master the art of making the perfect pie crust, passed on by my Grandma Hart and mother. As for the pie filling, that was much easier to master.
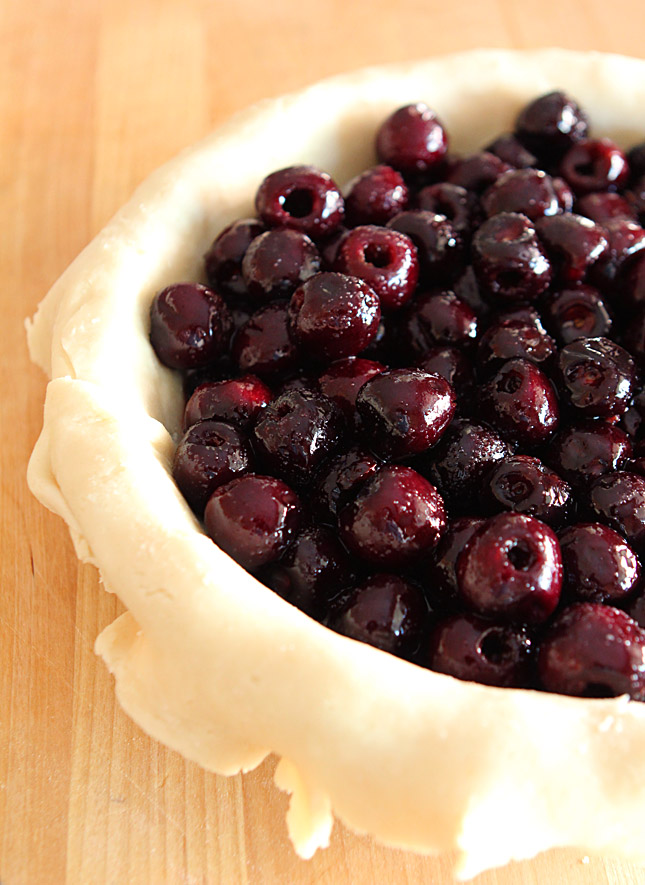
I’m sharing my recipe for Fresh Cherry Pie that has become a favorite of friends and family. Now, don’t expect this to be one of your typical “so sweet it will send you straight to the dentist” cherry pie, mine is sweet, with a little tartness. If you don’t want to mess with pitting the cherries you can buy frozen dark cherries (be sure and thaw and drain the cherries) or I have also used canned bing cherries before. Whenever you purchase canned fruit to make a pie, be sure you buy straight canned cherries, not cherry pie filling. This recipe will show you how to make your own cherry pie filling.
Fresh Cherry Pie
6 cups fresh pitted cherries, about 2 1/2 to 3 pounds
1/2 cup water
1 1/2 T. fresh lemon juice
2/3 cup granulated sugar
4 T. cornstarch
1/4 tsp. almond extract
1 tsp. fresh nutmeg
3 T. butter
In a saucepan over medium heat, combine cherries, water, lemon juice, sugar and cornstarch. Bring to a boil; reduce heat to low and cook, stirring frequently, for about 10 minutes.
Stir in almond extract and nutmeg. Cool slightly. Pour filling into a prepared pie crust, then add the butter on top of the pie. Add your second crust (make a lattice crust or try cutting out mini cookie cutter shapes). Top your crust with an egg wash made with 1 egg beaten and 1 T. water. Brush this mixture on the top of your pit crust, then sprinkle with raw sugar (or regular sugar). Bake in 350 degree oven for about 40 minutes or until the pie filling starts to bubble over.
True Shrimp & Grits…Southern-Style
 We recently returned back from a family vacation to Charleston, SC, where a staple food is Shrimp & Grits; the entire south is called “The Grits Belt,” and every restaurant menu has some version of the historical dish.
This simplistic meal is made of rich, creamy grits and topped with sausage, bacon, tomato, butter sauce, mushrooms, scallions, or even a fried egg.
According to Deep South Magazine, the origins of grits come from the Native American Muskogee tribe’s preparation of Indian corn similar to hominy. Writings from the Gullah Geehee also mention foods that resemble shrimp and grits. The Gullah are descendants of the slaves who worked on the rice plantations in South Carolina and Georgia, where many still remain today in rural communities. The Gullah decedents are found at many of the farmers markets in this region making and selling sweetgrass baskets and palmetto roses. Our children enjoyed watching many families make these handmade baskets during our time in Charleston. A young boy making palmetto roses at the Charleston Farmers Market thought Cora was so sweet he gave her a rose one day…she carried that rose the entire day.
As many did during hard times, the Gullah would make the most of local resources from the coast, like shrimp, and cook them many ways. Shrimp & Grits was devised from this culture and I have to say- THANK GOODNESS for terrific southern cuisines. I’ve always appreciated good county cooking that you find from different cultures that find unique ways to cook plentiful agricultural resources like meats and vegetables.
Here is my own take on true, southern-style Shrimp & Grits. I would strongly suggest using Royal Red Shrimp for this recipe, if you can find them. Royal Red Shrimp are sweet and buttery, similar to lobster. I’m very lucky to have a stellar farmers market that has a great vendor named Express Foods that provides fresh and frozen seafood- and never disappoints.
Shrimp & Grits
4 1/2 cups water
1 teaspoon salt
1 cup white grits
2 T. butter
2 ounces white cheddar cheese, shredded
6 slices bacon
1 cup chopped green pepper
3 garlic cloves, minced
1 cup chopped white onion
1 tsp. red pepper flakes
1 to 1 1/2 pounds shrimp, peeled and deveined
1 cup chicken stock
3 green onions, chopped (both white and green tops)
2 T. chopped parsley
Juice of a lemon, about 1-2 T.
Start with frying the bacon until crispy. Place bacon on plate and crumble. Keep about 2 T. of the bacon fat in sauté pan, turn off heat.
Bring a pot of water to a boil in a medium-sized pot. Add salt, then add grits and stir well. (I stir my grits slowly into the boiling water so I don’t’ get any lumps). When all the grits are incorporated, turn the heat down to a low simmer and cook the grits, stirring often. If you are using quick-style grits you will cook for about 10 minutes or stone-ground grits take around 30 minutes.
Clean and devein the shrimp. Keep about 1/3 of the shrimp whole, but chop the remainder.
Heat the bacon fat and sauté the onion and peppers for about 5 minutes on medium heat. Add the garlic, bacon and shrimp and gently toss together. Let cook for about 2 minutes. (Biggest mistake- overcooking shrimp. Shrimp are cooked when they turn pink.)
Grits should be ready, check and remove from heat. Add the stock to the vegetable and bacon/shrimp sauté pan. Let this mixture boil down for 5 minutes. Add cheddar cheese and butter to the grits and check to see if you need to add salt to the grits.
Ready to serve! Spoon grits into a large bowl. Add green onions, lemon juice and parsley to the shrimp, toss lightly. Spoon shrimp over the grits, serve immediately.
